10.Aug.2020
Tutorial of Memory Unboxing - The 5 Things You Should Do After Buying a New Memory
After using the computer for some time, many people want to upgrade their computers when they start to experience lag and slowdown. Usually, the first thing that comes to mind is to upgrade the SSD and the memory.
Here are the 5 things you should do after you get a new memory.

There are a few things to pay attention to on the packaging as well! The mainstream memory packaging on the market is divided into blister and carton sleeve packaging. The label information on the packaging is particularly important.
On the packaging of TEAMGROUP's memory, the product specifications, features, ICON introduction are clearly labelled, making it easy to understand at a glance.


T-FORCE DELTA RGB DDR4 | Where to buy
Don't be too violent when you open the outer packaging and take out the memory. The gold contacts and IC are very fragile.
Major inspection item: Are the gold contacts brand new, no scratches or oxidation? Is the PCB intact, no breakage, burrs? The next is to see if the heat spreader is flat.
However, I have never encountered any of these problems, so just think of it as a routine checkup.
*Please avoid squeezing the IC when holding the memory.
In addition, there is a product serial number sticker on every memory that you buy. Do not remove this sticker. You have to keep the sticker in order to have valid lifetime warranty.

The memory is designed to be error-proof. The left and right sides of the middle notch are different in length. Please pay attention to the direction you insert it, otherwise the gold contacts may break if you force plugging it in!
The wiring method of each motherboard is slightly different. Please refer to the user manual of the motherboard to make sure the location of the dual-channel when plugging in two memory sticks. The following image is an explanation in the ASUS motherboard user manual.

Make sure to turn off the power supply before installing or uninstalling the memory, otherwise the memory may be damaged if the power is still on!
After plugging it in, make sure there are no problems with other components first, and then boot the computer. However, please check the status of the memory in BIOS before entering Windows.
Please press the DELETE button in the first screen after you press the boot button, or press DELETE like crazy after you press the boot button to enter the BIOS.
There are some basic information after entering the easy mode screen of BIOS, but there’s not much that can be adjusted.
You can adjust more with the memory after entering the advanced mode. Since different motherboard manufacturers have different hotkeys, you can refer to the description on the screen.

The memory with frequency above 3200MHz on the market is dominated by overclocking memory. Only a few meet the native JEDEC 3200MHz specification, not to mention that high frequency such as 3600MHz, 4500MHz which require BIOS settings. Next, I'll show you how to reach the overclocking frequency that the manufacturer claimed, so don't ask again why only 2666MHz is displayed when you buy a 3600MHz one.
Take INTEL series of ASUS motherboard for example:
After entering the advanced mode, press the right arrow key on the keyboard to move to "Extreme Tweaker"

Next, press enter to select "Ai Overclock Tuner" and change to XMP, then you can press F10 to save and leave BIOS.

This is a way to simply turn on XMP to read the content of the SPD in the memory. It is simple and easy for rookies, and you can correctly overclock to the frequency indicated in the memory by the following steps.
If you want to adjust the frequency manually, here is a brief introduction to manual overclocking, but the matching of values and some more detailed adjustments require experience accumulation.
In the same way, on the "Extreme Tweaker" page, please go to "DRAM Frequency" and press Enter to select the frequency.

After selecting the frequency and press Enter to confirm, scroll down to "DRAM Timing Control" and press Enter, then you will see "DRAM CAS# Latency" which is the CL value. The next three cells of CL need to be adjusted accordingly, then try again on your own.


After adjusting the CL value, voltage is the next to be considered. Press the left arrow key to go back to the previous page of the CL setting, go down to the "DRAM Voltage" and input voltage. It also requires experience to determine how much voltage is sufficient to support the set frequency.

New gamers may not be able to get into Windows, and keep entering BIOS automatically due to incompatible values or settings that exceed the highest frequency supported by the motherboard and CPU. Now adjust the values again, or press the shortcut to restore all settings to default factory values, then you can enter Windows again!
At this point, the preparation is basically done. Don't rush to play the game just yet, make sure that the content you just adjusted is actually working.
Check the operation status of the memory by using the CPU-Z software. After downloading and running the software, click on the "Memory" at the top, and then look at the DRAM Frequency at the bottom. The displayed value multiplied by 2 is the frequency in the actual operation.
CPU-Z download

Why multiply it by two? The full name of DDR4 is Double Data Rate, therefore we need Double to calculate the frequency. Beneath the frequency, you can also see the CL value in operation.
That's it for the basic introduction to memory. Now you can also buy components to upgrade your computer, or install it yourself!
Here are the 5 things you should do after you get a new memory.
1. Open the package of the memory
There are a few things to pay attention to on the packaging as well! The mainstream memory packaging on the market is divided into blister and carton sleeve packaging. The label information on the packaging is particularly important.
On the packaging of TEAMGROUP's memory, the product specifications, features, ICON introduction are clearly labelled, making it easy to understand at a glance.
T-FORCE DELTA RGB DDR4 | Where to buy
Don't be too violent when you open the outer packaging and take out the memory. The gold contacts and IC are very fragile.
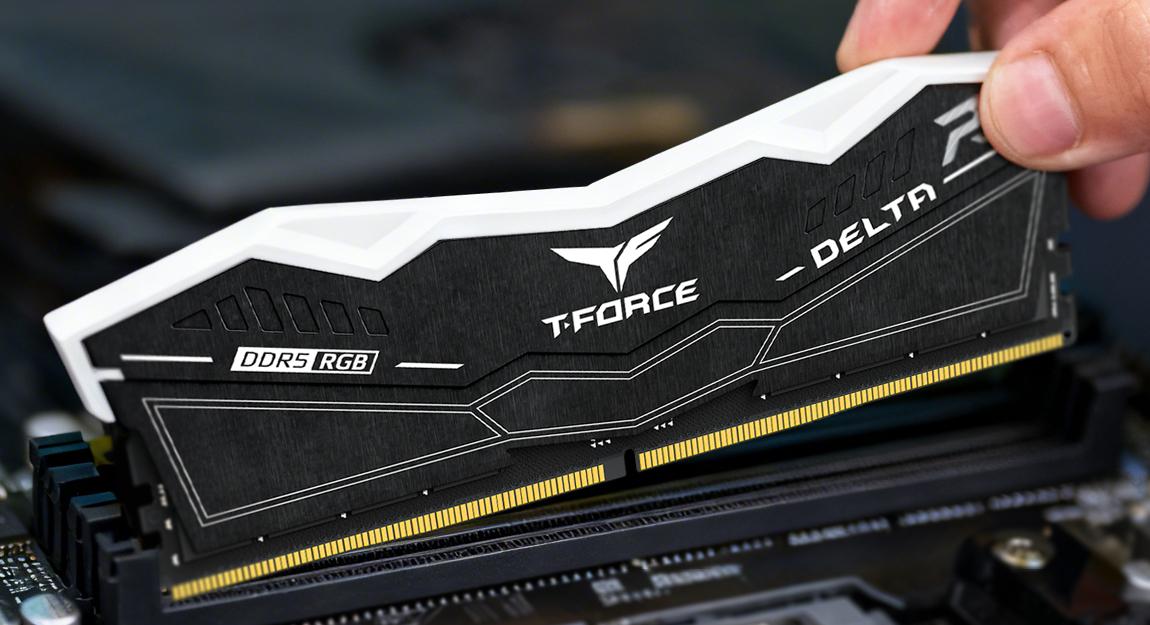
2. General visual inspection of the entire memory
Major inspection item: Are the gold contacts brand new, no scratches or oxidation? Is the PCB intact, no breakage, burrs? The next is to see if the heat spreader is flat.
However, I have never encountered any of these problems, so just think of it as a routine checkup.
*Please avoid squeezing the IC when holding the memory.
In addition, there is a product serial number sticker on every memory that you buy. Do not remove this sticker. You have to keep the sticker in order to have valid lifetime warranty.
3. Plug it onto the motherboard
The memory is designed to be error-proof. The left and right sides of the middle notch are different in length. Please pay attention to the direction you insert it, otherwise the gold contacts may break if you force plugging it in!
The wiring method of each motherboard is slightly different. Please refer to the user manual of the motherboard to make sure the location of the dual-channel when plugging in two memory sticks. The following image is an explanation in the ASUS motherboard user manual.
Reminder
Make sure to turn off the power supply before installing or uninstalling the memory, otherwise the memory may be damaged if the power is still on!
4. BIOS setting
After plugging it in, make sure there are no problems with other components first, and then boot the computer. However, please check the status of the memory in BIOS before entering Windows.
Please press the DELETE button in the first screen after you press the boot button, or press DELETE like crazy after you press the boot button to enter the BIOS.
There are some basic information after entering the easy mode screen of BIOS, but there’s not much that can be adjusted.
You can adjust more with the memory after entering the advanced mode. Since different motherboard manufacturers have different hotkeys, you can refer to the description on the screen.
The memory with frequency above 3200MHz on the market is dominated by overclocking memory. Only a few meet the native JEDEC 3200MHz specification, not to mention that high frequency such as 3600MHz, 4500MHz which require BIOS settings. Next, I'll show you how to reach the overclocking frequency that the manufacturer claimed, so don't ask again why only 2666MHz is displayed when you buy a 3600MHz one.
Take INTEL series of ASUS motherboard for example:
After entering the advanced mode, press the right arrow key on the keyboard to move to "Extreme Tweaker"
Next, press enter to select "Ai Overclock Tuner" and change to XMP, then you can press F10 to save and leave BIOS.
This is a way to simply turn on XMP to read the content of the SPD in the memory. It is simple and easy for rookies, and you can correctly overclock to the frequency indicated in the memory by the following steps.
If you want to adjust the frequency manually, here is a brief introduction to manual overclocking, but the matching of values and some more detailed adjustments require experience accumulation.
In the same way, on the "Extreme Tweaker" page, please go to "DRAM Frequency" and press Enter to select the frequency.
After selecting the frequency and press Enter to confirm, scroll down to "DRAM Timing Control" and press Enter, then you will see "DRAM CAS# Latency" which is the CL value. The next three cells of CL need to be adjusted accordingly, then try again on your own.
After adjusting the CL value, voltage is the next to be considered. Press the left arrow key to go back to the previous page of the CL setting, go down to the "DRAM Voltage" and input voltage. It also requires experience to determine how much voltage is sufficient to support the set frequency.
Reminder
It is recommended to increase the voltage little by little Setting too high at a time may cause memory damage!
New gamers may not be able to get into Windows, and keep entering BIOS automatically due to incompatible values or settings that exceed the highest frequency supported by the motherboard and CPU. Now adjust the values again, or press the shortcut to restore all settings to default factory values, then you can enter Windows again!
5. Check the overclocking information
At this point, the preparation is basically done. Don't rush to play the game just yet, make sure that the content you just adjusted is actually working.
Check the operation status of the memory by using the CPU-Z software. After downloading and running the software, click on the "Memory" at the top, and then look at the DRAM Frequency at the bottom. The displayed value multiplied by 2 is the frequency in the actual operation.
CPU-Z download
Why multiply it by two? The full name of DDR4 is Double Data Rate, therefore we need Double to calculate the frequency. Beneath the frequency, you can also see the CL value in operation.
Conclusion
That's it for the basic introduction to memory. Now you can also buy components to upgrade your computer, or install it yourself!