How to Install the T-FORCE SIREN GD120S AIO SSD Cooler

The first integrated liquid cooler SIREN GD120S in the world designed for M.2 2280 SSD has an AIO Cooler. Its installing process is different from the GA and GD series, which we are familiar with. Then how do you install SIREN GD120S for M.2 2280 SSD? Today, we are going to share how to install the integrated liquid cooler SIREN GD120S AIO SSD
You can always check out our TEAMGROUP Youtube Channel for installation videos at anytime.
Table of Contents
- Installing the 120 mm Fan and Cold Plate
- How to Install M.2 2280 SSD
- Placing the Radiator at a Fixed Position
- Installing the Power and Light Cables
Installing the 120 mm Fan and Cold Plate
The first M.2 2280 AIO SSD Cooler in the world has an integrated All-In-One form combing the water pump, radiator, water block and tube. We recommend you to first install the core hardware (e.g. motherboard) in the chassis and then install SIREN GD120S and M.2 2280 SSD in the chassis. As a final step, install the graphic card to the motherboard. You will have a smoother experience with this installing order.
First, install the fan on the radiator at a fixed position. Remember to install the fan on the chassis in the direction of your internal airflow plan. If you are not sure how to install the fan, you may refer to the previous article, “How to Properly Install the T-FORCE SIREN DUO360 AIO ARGB CPU & SSD Liquid Cooler? What Is the Difference Between a Single Water Block and a Dual Water Block Installation? “ to confirm the direction to install the fan for the radiator.
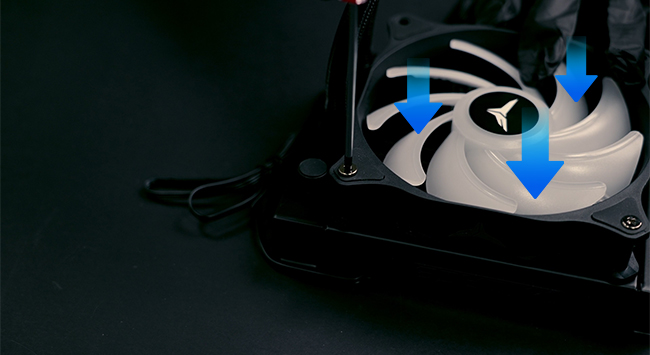
∆ Check the wind flow direction before tightening the screws on the fan.
Attach the long screws from the fan kit to the radiator, and then attach the radiator to the chassis. Remember to check whether there is enough space to install the 120 mm radiator in the chassis.

∆ Confirm the location for the 120 mm radiator before placing it on the chassis.
How to Install M.2 2280 SSD
The integrated liquid cooler T-FORCE SIREN GD120S AIO SSD is only compatible with M.2 2280 SSD. You may not install this liquid cooler for other models 2230 / 2242 / 22110.
Install the SSD into the space designated for the water block. If the SSD itself already has a graphene heat sink, there is no need to remove it. In the case of retaining the graphene heat sink, affix a thermal pad to ensure complete heat conduction from the M.2 SSD to the water block.

∆ The graphene heat sink on the front of the SSD can be kept. When placing it into the installation space for the water cooling head, pay special attention to aligning the two holes of the M.2 SSD with the water cooling head.
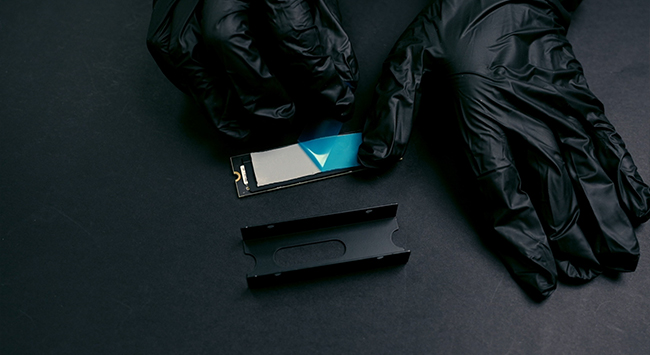
∆ Apply a thermal pad to the M.2 SSD for effective heat conduction.
In this step, pay particular attention to aligning the two holes of the M.2 SSD with the fastening points of the water cooling mechanism. The holes of the M.2 SSD should be on the same side as the fastening points. Once properly positioned, secure the side screws.
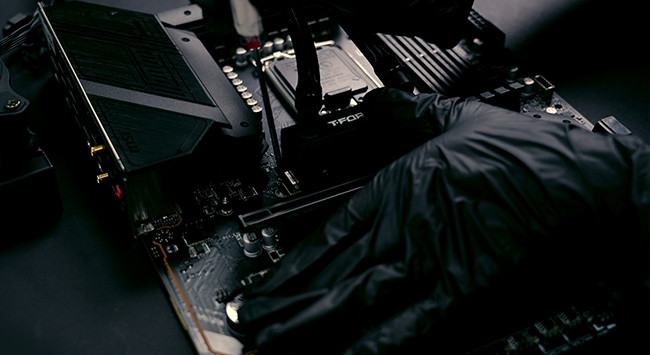
∆ Secure a total of four screws on both sides of the water block.
Placing the Water Block at a Fixed Position
Before installing the water block, test the direction of the tube to make sure that the installing locations of the tube and the graphics card do not have conflict. If there is any conflict to install the liquid channel and the graphics card, you can adjust the direction of the tube so that the SIREN GD120S water cooler can be installed properly.
Next, we will install the water block of the integrated liquid cooler T-FORCE SIREN GD120S AIO SSD on the motherboard. Align the holes of the radiator to the M.2 SSD copper pillar on the motherboard. Then tighten the screws for the copper pillar to place the water block at a fixed position. If you lost the M.2 SSD copper pillar on the motherboard, a set of M.2 SSD copper pillar and screws are included in the accessories of SIREN GD120S.

∆ Tighten the set screws after aligning the holes.
Installing the Power and Light Cables
For the integrated liquid cooler T-FORCE SIREN GD120S AIO SSD, you need to connect the DC 3-Pin cable for the liquid pump and the PWM 4-Pin cable for the fan to power up. If the fan or pump is not running and the cooling performance is poor, check to see if the two power cables are plugged into the motherboard.
In addition, if the fan is spinning crazily when connected to the motherboard slot, go to the motherboard control software or BIOS to check whether the power supply mode of the slot where the fan is installed is PWM mode. If the motherboard is using DC power supply mode under AUTO setting, remember to switch it to PWM mode.
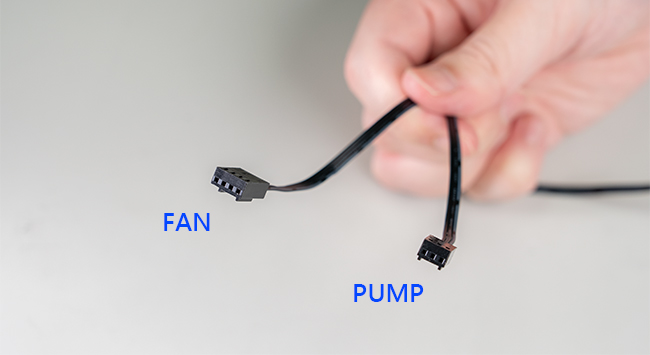
∆ The liquid pump requires power from DC 3-Pin while the fan requires power from PWM 4-Pin.
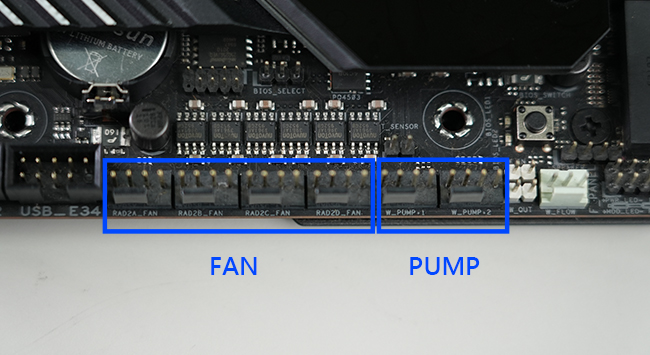
∆ Plug the cables to the motherboard slot in order to enable the fan and the water pump.
SIREN GD120S has a 120 mm ARGB Fan. You could set the light effect using the light control software from the motherboard manufacturer after plugging the ARGB cable on the motherboard slot. If you don’t know how to use the light control software for the motherboard, you can refer to the Article, “Why are ARGB DRAM White Lights Different? Lighting Control Tutorials Using Motherboards from Four Manufacturers”.
In addition, as a reminder, you can plug the ARGB cable on 5V 3-Pin slot but not on the RGB 12V 4-Pin slot, otherwise, it may burn down!
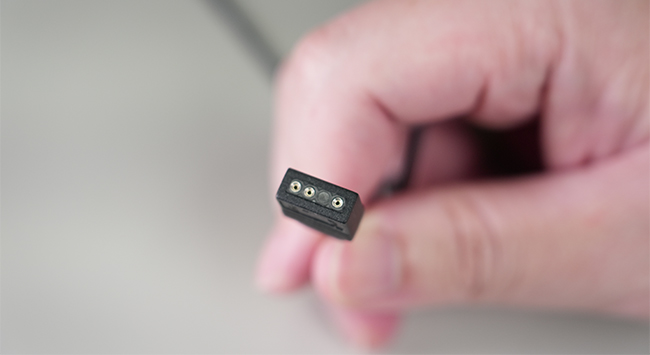
∆ Plug the 5V 3-Pin ARGB to enable the lights of the fan.
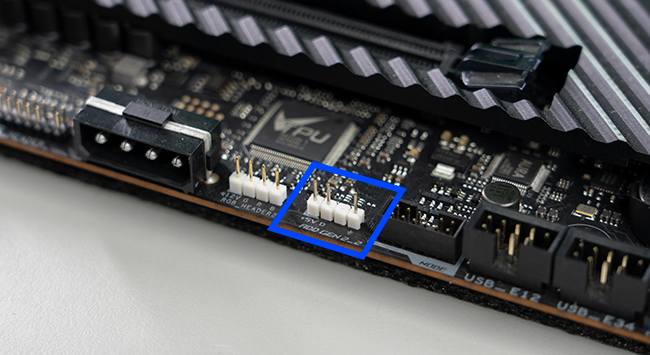
∆ Plug the ARGB cable on 5V 3-Pin slot but not on the RGB 12V 4-Pin slot.
We have share how to install the first M.2 2280 AIO SSD Cooler. Its installing procedure and details are different from the AIO CPU Cooler used in the past. You could quickly understand how to install SIREN GD120S through this article. In addition, if you would like to know more about the heat dissipation performance of the integrated liquid cooler, you could refer to the other article, “Keeping Your PC Cool: The World's First High-Performance Integrated Liquid Cooler - GD120S M.2 2280 SSD”
RELATED Blog
1
9
11.Jun.2025
Green Tech: Performance Meets Sustainability
05.Mar.2025
Gaming PC vs. Console: Which is Better?
12.Dec.2024
Understanding CAMM2: Is it the End of SO-DIMM?
30.Oct.2024


